Be prepared to be baubled over with your very own bauble wreath!
Whether it be neutral, simple foliage or something with a bit more bling behind it, we love nothing more than embracing a Christmas tradition or two. So, we decided to combine our love for the traditional bauble and a homely wreath to create a DIY with a difference using our very own white fairy lights.
Come Christmas time, you’ll struggle to find a home without a stunning Christmas wreath gracing its doorway – and sometimes even a glorious garland to match – but regardless of where you are, people simply love ramping up the cheer whatever the weather once December comes around.
Now, the elements may not always be kindest when it comes to winter, so this year we’re escaping the cold and snuggling up warm inside our very own Winters Lodge. An assortment of luscious greens, deep blues and pearly white lights make up this trend which is sure to transport you directly to a cosy Nordic escape – which is exactly the vibe we’ve gone for in our latest DIY how-to video.
Things you’ll need to create your bauble wreath:
- A wire clothes hanger.
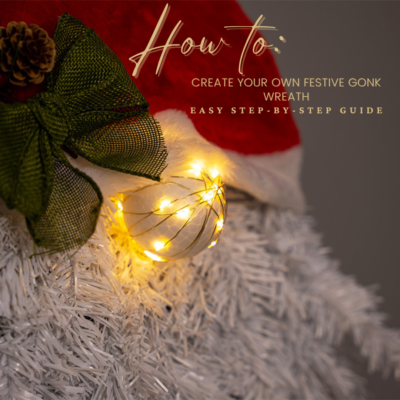
- Our bright white Firefly Wire battery lights.
- A selection of blue, green, and silver baubles (we got a selection of icy inspired baubles from Amazon).
- Hot glue gun.
- Wire cutters.
- Large festive ribbon or bow.
Step-by-Step:
1.Before you begin, take time to test that your battery lights are working correctly.
2. Then, start by re-shaping the hanger into a hoop shape for the body of your wreath. This doesn’t have to be a perfect circle but needs to have the basic shape for the desired outcome.
3. After this, carefully use the wire cutters to untwist the hook at the top of the loop, leaving both ends loose.
4. Cut the string off your baubles and remove the silver cap. Using the hot glue gun, carefully put a dab of glue inside the cap and reinsert back onto the bauble. This will ensure that your baubles won’t fall from the wreath at a later date.
5. Begin to thread your baubles onto the hanger, alternating in size, colour and style to create a fuller, festive effect.
6. Once the hanger is full, carefully retwist the ends of the hanger back together using the wire cutters.
7. Now it’s time to add the lights. Secure the battery pack into place at the back of the wreath using hot glue. Unwind your wire lights and intertwine them between the baubles, threading the lights in and around the different baubles. TOP TIP: Make sure that the switches are facing outwards for easy access in the future.
8. To cover the battery pack, secure a Christmas bow to the front of the wreath, flick on your lights and hang your brand-new bauble wreath with pride.
And just like that, you have yourself a unique, one-of-a-kind wreath perfect for your home. Why not give it a go and share your creations with us over on our socials? Use our hashtag #SharetheJoy over on Twitter or Instagram and we’ll share our favourites! For more lighting and DIY inspiration, head over to our Pinterest page!